Contouring and highlighting seems to be an ongoing makeup trend; and a secret that every celebrity makeup artist uses to sculpt your face and make the most of your unique facial structure. Recently made popular by none other than Kim Kardashian. Contouring and highlighting is a technique I feel is sometimes overused, and can look dreadful if it is not applied correctly. Let’s reminisce on that time Nicki Minajs makeup artist forgot to blend her nose… Lets not re-live that.
 |
| site: |
Here’s a little guide I put together that I hope helps anyone looking to start, or just curious as to how I apply my makeup..
- Know your face shape.
 |
- Choosing the right products.


- Finding that perfect shading tone and highlighter.
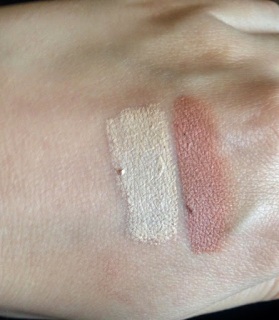

Being taught makeup professionally I have always been told to choose a shade three shades lighter than your skin tone, and a shader a couple of tones darker. Okay, personally I do not stick to this when I go dark I go dark. I tend to only go a few shades lighter with my concealer as there is usually a believable contrast (I also fake tan this means you can afford to go darker). Stay clear of products with an orange or red tone trust me it will end in tears.
- Choose your tools wisely.


Now we’ve got that out of the way, here’s how I contour and highlight.

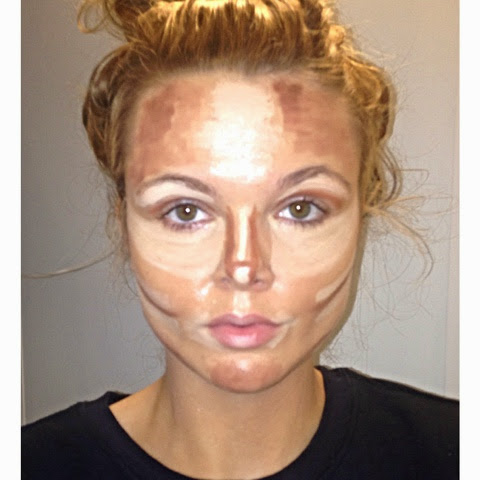
- Apply the light shade of product on the center of the forehead, the center of the nose,under the eyes. above your cheekbones, under the brow, and on the crossbow.
- Using the shading product, I apply it at the sides of my forehead, on the temples, along the sides of my nose. below my cheekbones, in the socket of my eye and in the point of my chin


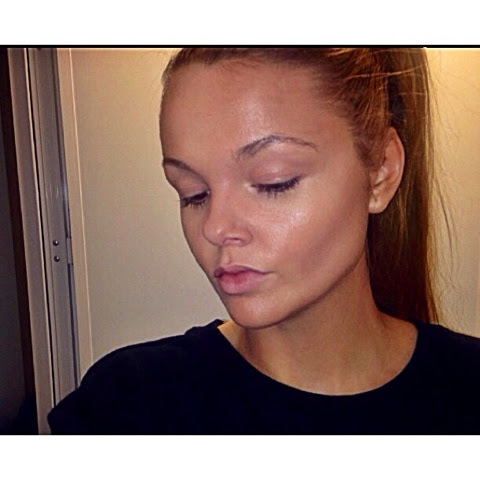
- I then blend using a beauty blender, this blends cream products beautifully. I blend until I cannot see any harsh lines and my face looks more sculpted.
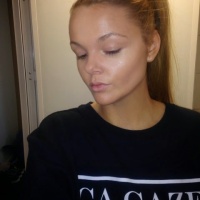
- To finish off the look apply your favourite smokey eye and nude lip.
-


A great contouring tutorial 🙂 Always great to see great makeup tips and tricks. http://www.shehearts.net x
LikeLike
This is a really great post but I am not really into contouring because I feel like whenever I do it I look like a drag queen but it looks nice on some people
LikeLike
Thank you sweet!
LikeLike
oMG first off ….you are pretttty!!! Second off, thanks for the tip
http://www.populairelife.co.uk
LikeLike